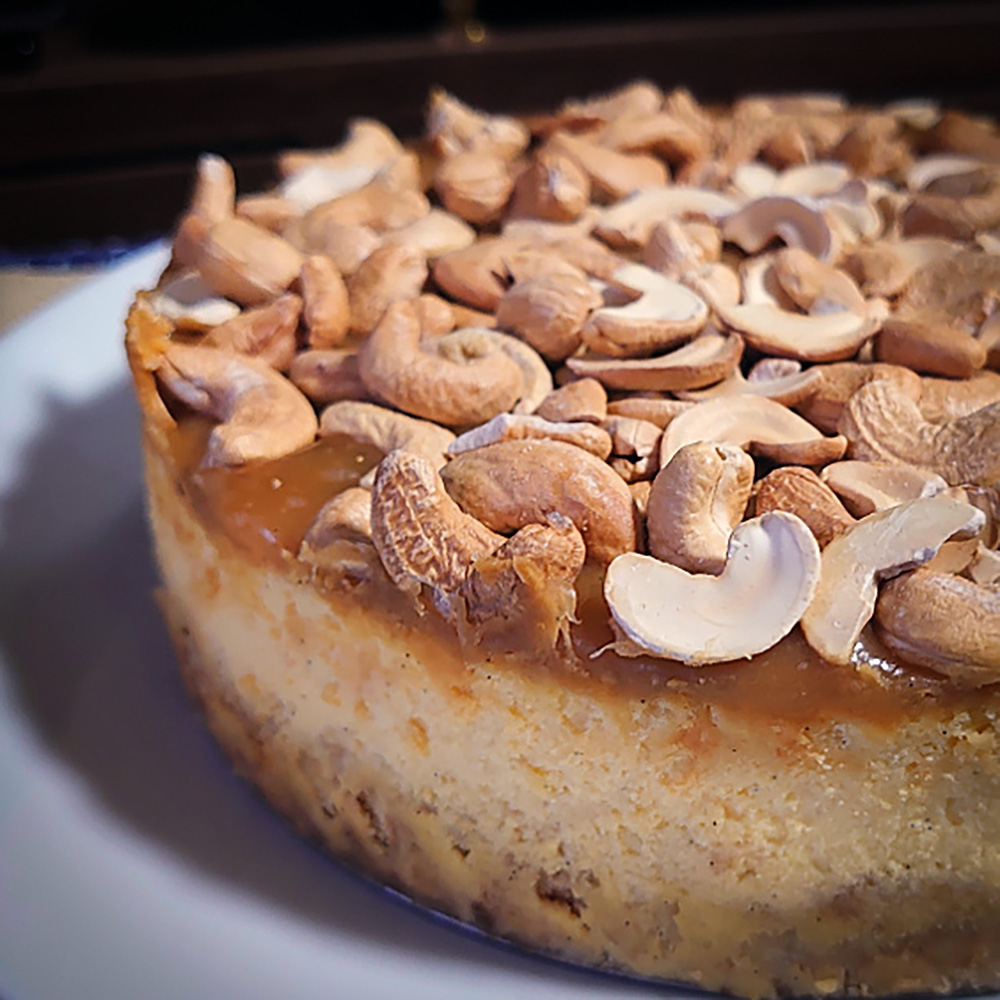
Celebrate With a Nutty Valentine’s Cheesecake
Skip The Chocolates!

Tired of chocolate taking center stage? Try a cheesecake instead!
It’s nearly Valentine’s Day and chocolate is everywhere. You’re probably aware that there are two different kinds of chocolates in Japan, giri choco (obligatory chocolates) and honmei choco (true love chocolates), and if you aren’t—read all about celebrating Valentine’s Day in Japan and homemade chocolate treats to start things off.
Chocolate is the standard gift for the holiday, but what if the person you’re interested in doesn’t like chocolate? What if you’re having a socially-distanced Galentine’s Day and want something more substantial to share? What if you just want to make something ridiculously self-indulgent and don’t care about the holiday at all?
The answer to all those questions is cheesecake. Here is my best friend’s brilliant, adaptable cheesecake recipe that I attempted for Valentine’s this year.
Before you get started, there are four things to keep in mind:
- Make sure you have Japanese measuring cups, as 1 cup in Japan is only 200 milliliters, compared to an American cup which is 240 milliliters.
- You will need an oven for this recipe but it’ll work with a toaster oven too. You’ll need to adjust the recipe in size/temperature for your appliance though. For most toaster ovens, cutting the recipe in half will make a smaller, “mini pizza” size cheesecake and should take around 35-45 minutes to bake at the medium-high setting. This again depends on your device. Check the manual that came with it or online from the manufacturer for their specifications.
- All ingredients should be at room temperature.
- This will make a good-sized cheesecake, but it can be frozen and kept for up to three months.
Ingredients
Topping:
- 1-2 packages of any dry roasted, unsalted nuts (Kaldi has the widest selection of unsalted nuts)
Sauce:
- 1 cup of sugar
- 6 tablespoons of butter
- ½ cup of heavy cream or yogurt*
- a pinch of salt (pink, vanilla, table, or sea varieties)
Cheesecake base:
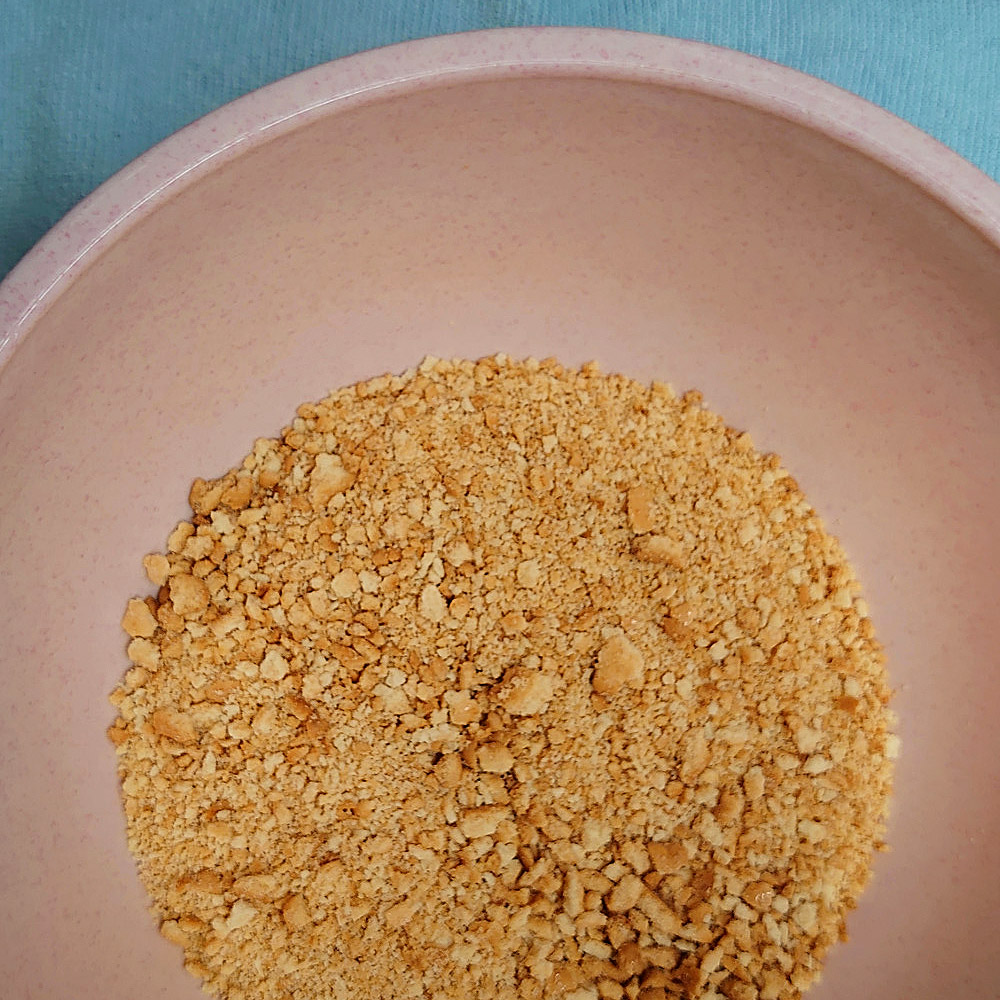
- 1 ½ cups of cookie crumbs
- 4 tablespoons melted butter
Cheesecake itself:
- 16 oz cream cheese
- ½ cup of sugar
- ½ cup of yogurt
- 2-3 eggs*
- 1 teaspoon of vanilla
- 1 vanilla bean pod (optional)
* If you can’t find heavy cream, a plain or non-fruit flavored yogurt works just as well.
** 2 eggs for a standard baked cheesecake texture, 3 eggs for a custardy, heavier texture.
Materials Required:
- 1-2 large mixing bowls
- 1 heat safe bowl or container
- 1 medium pot
- Japanese measuring cup/spoons
- Mixer (any type works)
- 16-20 centimeter springform cake pan
Method:
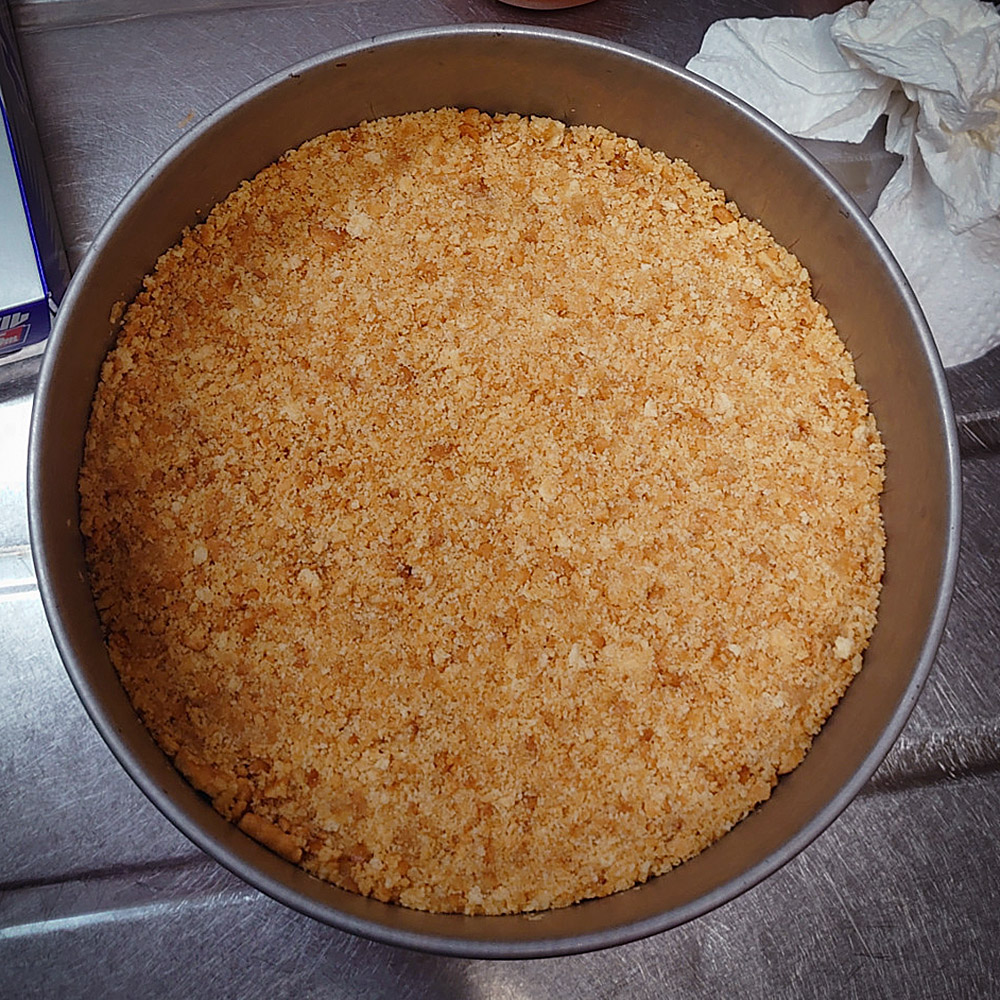
- Start breaking up the cookies. Coconut sable (shortbreads) work really well because they’re flakey and easy to break already. You can either put them in a freezer bag and smash them up by hand/rolling pin or put them in a bowl and use a large spoon, potato masher, a pestle, whatever you have to grind them down into the desired texture. I like to leave a few larger pieces in because of that, but it’s up to you. Once you’ve got the texture you need, set that aside.
- Now it’s time for the caramel sauce. This is the easiest part of the cheesecake to mess up, but if you remember to keep an eye on your temperatures and don’t let yourself get distracted, you can do this. If you have your own way of making a caramel sauce or would rather just buy one, go for it! If not, these are the steps:
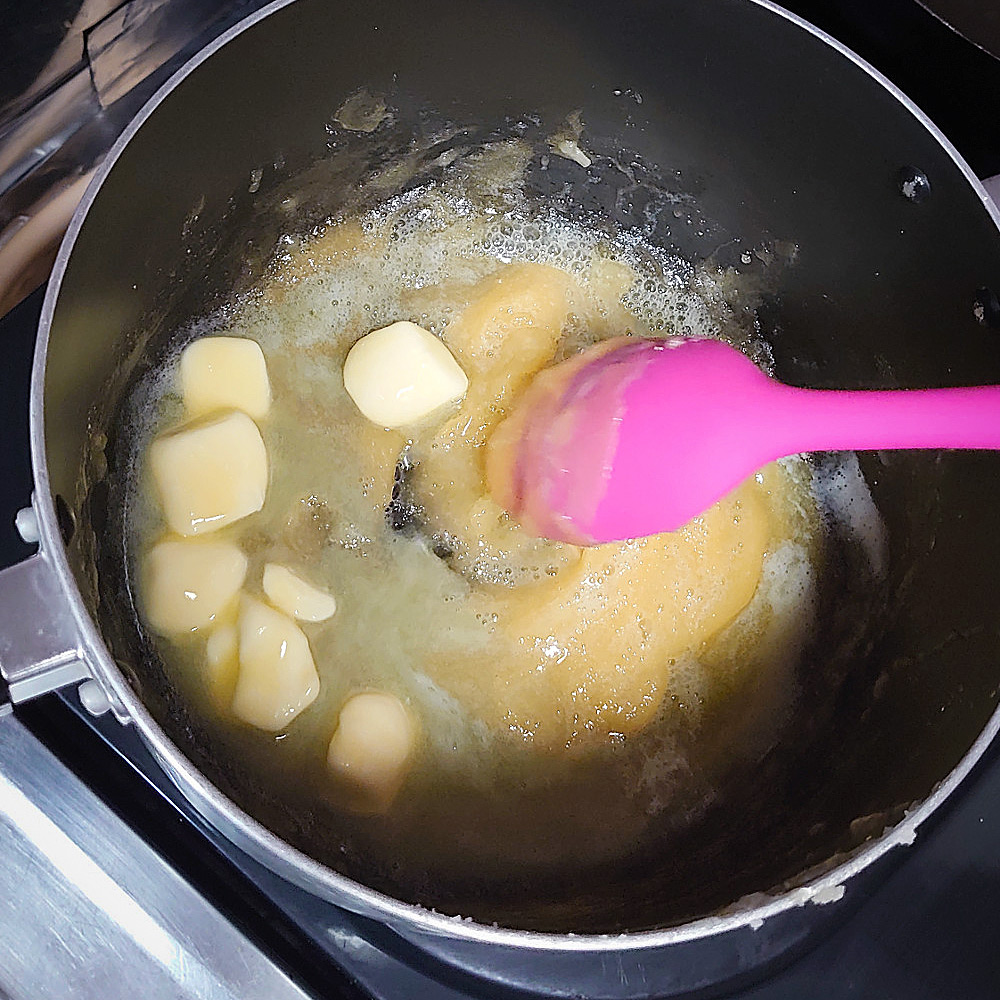 Start slowly heating the sugar, stirring constantly. You want it to melt but not start to burn. After it becomes a bubbling liquid and turns a pale amber color, add the butter and continue stirring. Once that’s melted into the mix, slowly add the yogurt, mixing it in carefully as well. Again, keep an eye on the heat so that you don’t end up with a burnt mess or with sugar lumps in the sauce. When it’s reached the desired thickish sauce consistency, pour your sauce into the heat-safe bowl and set it aside for now.
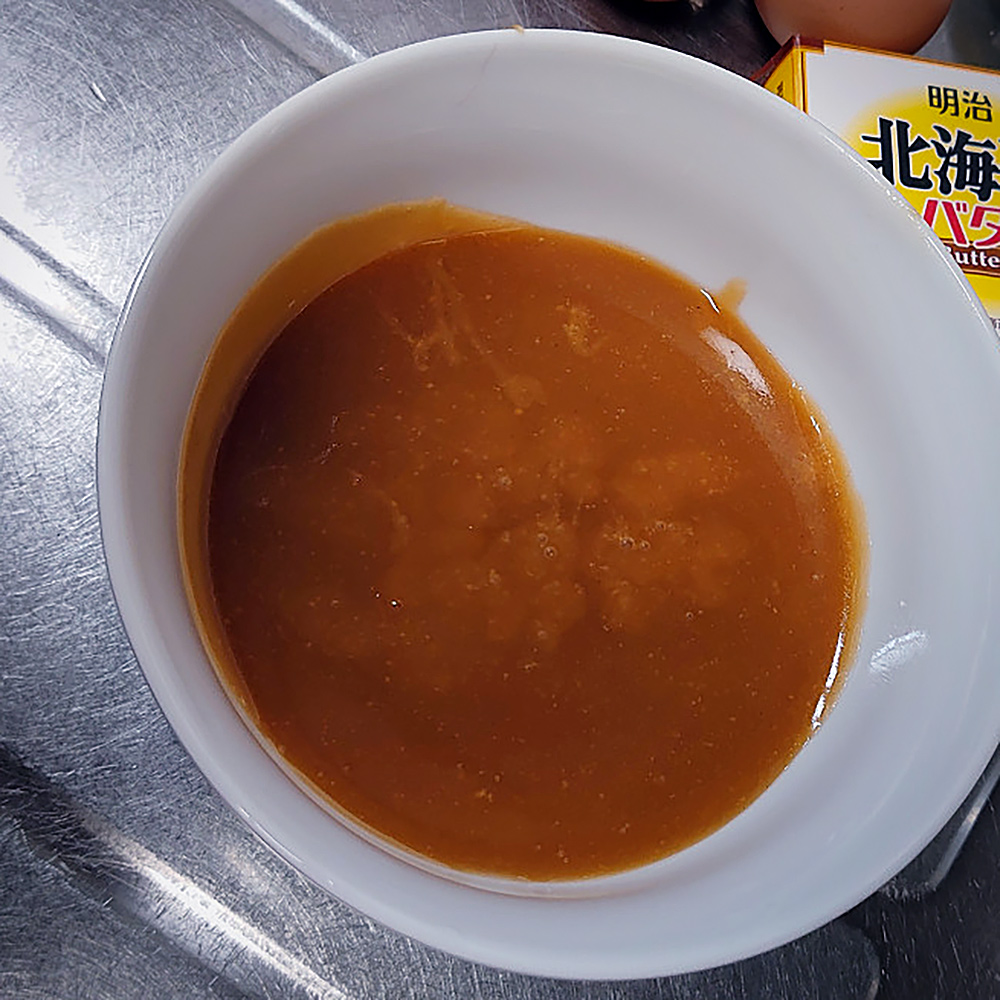
- Melt the butter for the base, pour it into the bowl then mix it until it starts to clump together. Transfer the base mixture to the springform pan and push it down with a spoon or anything with a flat base until it’s an even layer across the bottom of the pan. Here you can either set it aside or bake the base at 180 degrees Celsius for five to seven minutes if you prefer a firmer base.
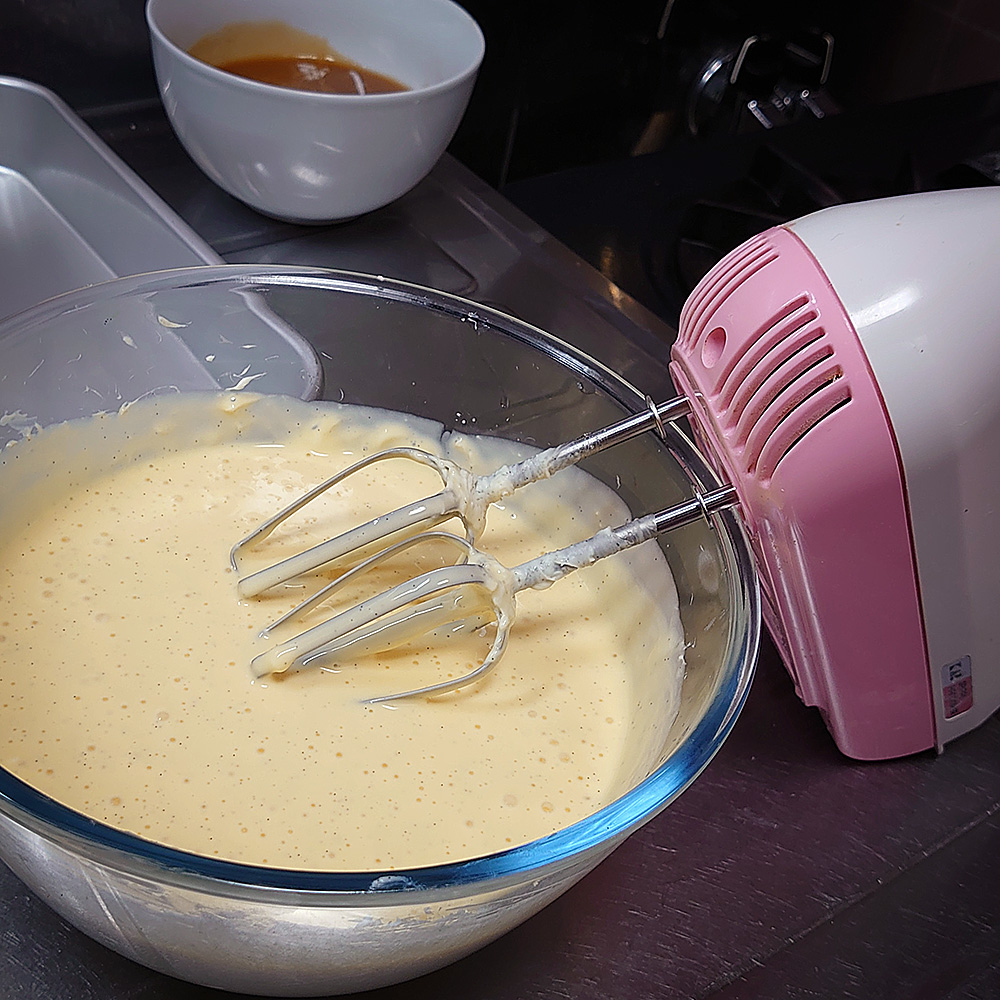
- Now you’re ready to make the cheesecake itself. Put the cream cheese and sugar in your mixing bowl and start mixing. Once they’ve reached a creamy consistency, add your vanilla extract and vanilla bean if you’re adding it, plus the yogurt and continue mixing. After that’s worked through, add your eggs one at a time. Once the last egg is mixed in, stop mixing. You should end up with a vaguely cream-colored mixture.
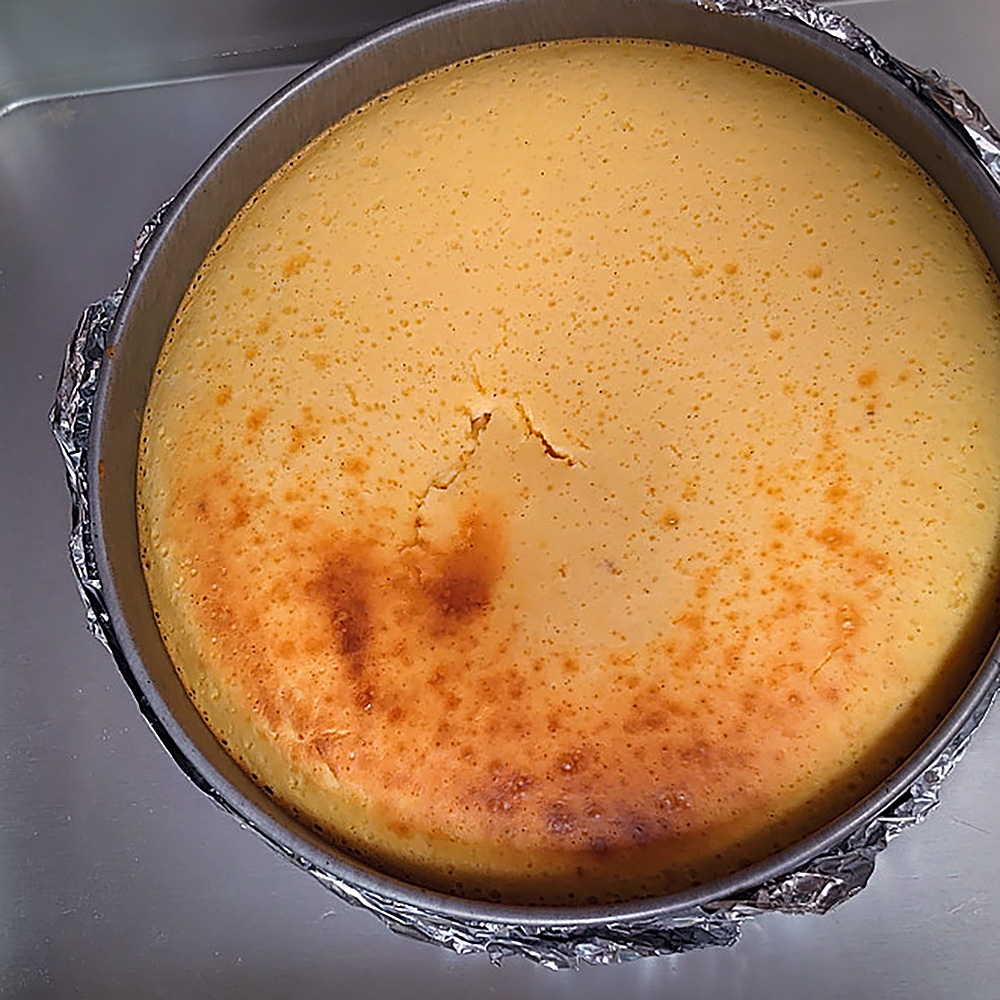
- Pour the cheesecake mixture over the base. Make sure you have poured it in evenly and that there aren’t any bubbles. Now you have another option: you can bake the cheesecake as is, or you can put it in a water bath. A water bath is recommended if you’re worried about the cheesecake cracking or falling too much while it’s baking. To do a water bath, wrap the bottom of the springform pan in aluminum foil (1-3 layers depending on how careful you want to be) and set it on a shallow cooking pan. Boil as much water as needed to cover about 1-2 centimeters up the side of the springform pan. Place this on the oven rack.
- Bake at 180 degrees Celsius for 55-70 minutes, depending on your machine. I set mine to bake for an hour and checked it at the 55 and 65-minute mark. I took mine out at 60 minutes.
- Chill the cheesecake for 4 hours (or overnight if you prefer, but you may have to reheat the caramel sauce if so).
- Time to decorate! You can either remove the cheesecake from the springform and pour the caramel over top, or pour it on in the springform to keep the sides “clean.” Then add the nuts of your choice, and you’re finished! Note: if you want the caramel to hold its shape, return it to the fridge for no less than half an hour.

As I mentioned before, this cheesecake is adaptable. You can put pretty much any topping you like on it, be that nuts, fresh fruit, fruit preserves, chocolate or coffee sauce—or even a liqueur if you like. Choosing a different cookie for the base will change it up, too, so once you’ve got the knack, go for it! Enjoy the creative process.
I hope you and whoever you choose to share your culinary endeavors with enjoy this decadent treat. And if you’re in the mood for some romantic and questionable stories of Valentine’s past, check out these reader submissions. Happy Valentine’s Day everyone!


Related Articles You Might Like

Celebrating Valentine’s Day in Japan
The so-called "female arts" of cooking, decorating and witchcraft take center stage when Valentine’s Day rolls around.
By Hilary Keyes

Recipe: Healthy Valentine’s Day Chocolate Hearts
This time of year, stores all over Japan are overflowing with Valentine's Day chocolates. Unfortunately, most of what's available is highly processed and contains loads...
By Luisa Heenan

Letters from Japan: White Day Questions
Savvy Tokyo's resident "Love in Japan" columnist, Hilary Keyes, answers anonymous questions from readers on everything from dating in Japan to women’s health issues. Got...
By Hilary Keyes

Valentine’s Day? More Like Galentine’s Day
Treating yourself and your friends right on Valentine’s Day
By Hilary Keyes
Leave a Reply